
How to Shape Your Brows for a Natural Look
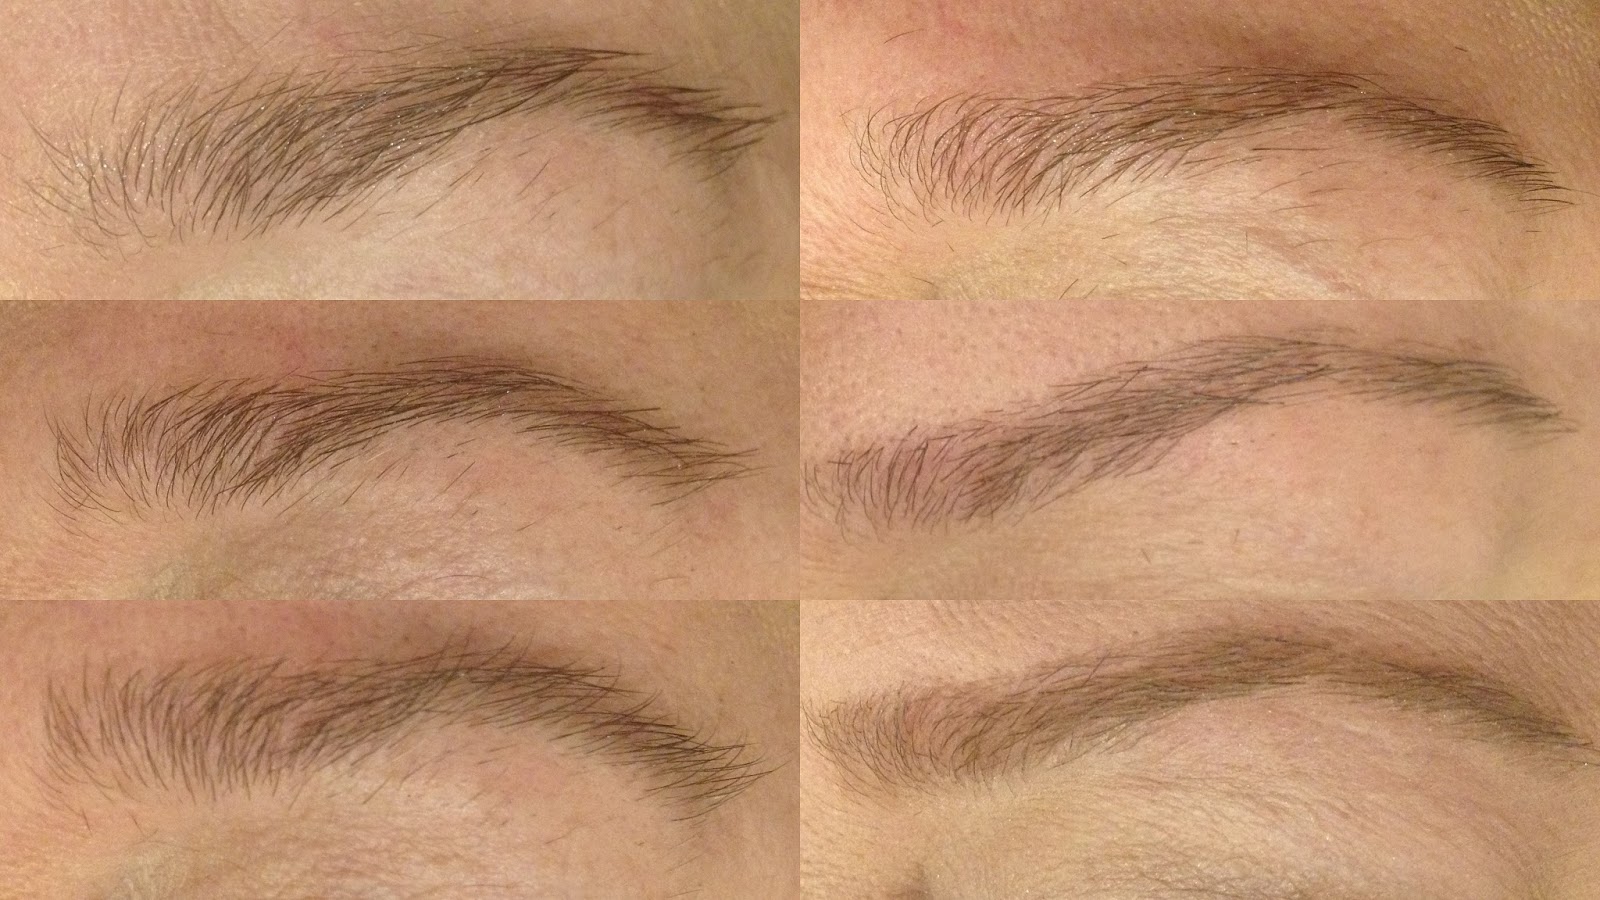
As you can see above that’s the full process, but let’s take that apart to make it even more simple.
You’ll need:
Facial Razor (Optional, you could use tweezers)
Tweezers
Spoolie
Scissors
Brow products of your choice
Firstly, we have the natural, grown out (or if this is your first time, never groomed) brow. With my Mum’s there is a shape that you can easily see, it’s just very grown out and untidy. My first step is to take some sort of thick cream or even shaving cream and place it above the eyebrow (some people won’t need to do this). Then take a facial razor (I got mine from Amazon, really cheap!), and simply take away any hairs that shouldn’t be, or that you don’t want there. I run the razor down just a little before I want the eyebrow to start, you can always take more away if needed, but I’d rather that then lose half a brow.


Then you’ll have your finished brow! At this point you may choose to run a brow mascara through the brow to give it extra definition, or for a softer look (my mum’s 50, gradient brows aren’t her thing), add a eye shadow through the brow, a little lighter than what you would think. Here I’m using MUA’s Matte Palette from Superdrug which is £4! This makes her eyebrows stand out without being too much.
There’s nothing too complicated to grooming brows, you just have to be confident enough to take a razor and scissors to them, knowing that if you follow steps and always take less than you think, you can’t go too wrong! (Please note: If you do manage to slip and take your entire brow off, then I can’t take responsibility. However, I do have another tutorial coming up for those with non-existent eyebrows.) Good luck, let me know how it goes!
