
How To Contour on Pale Skin
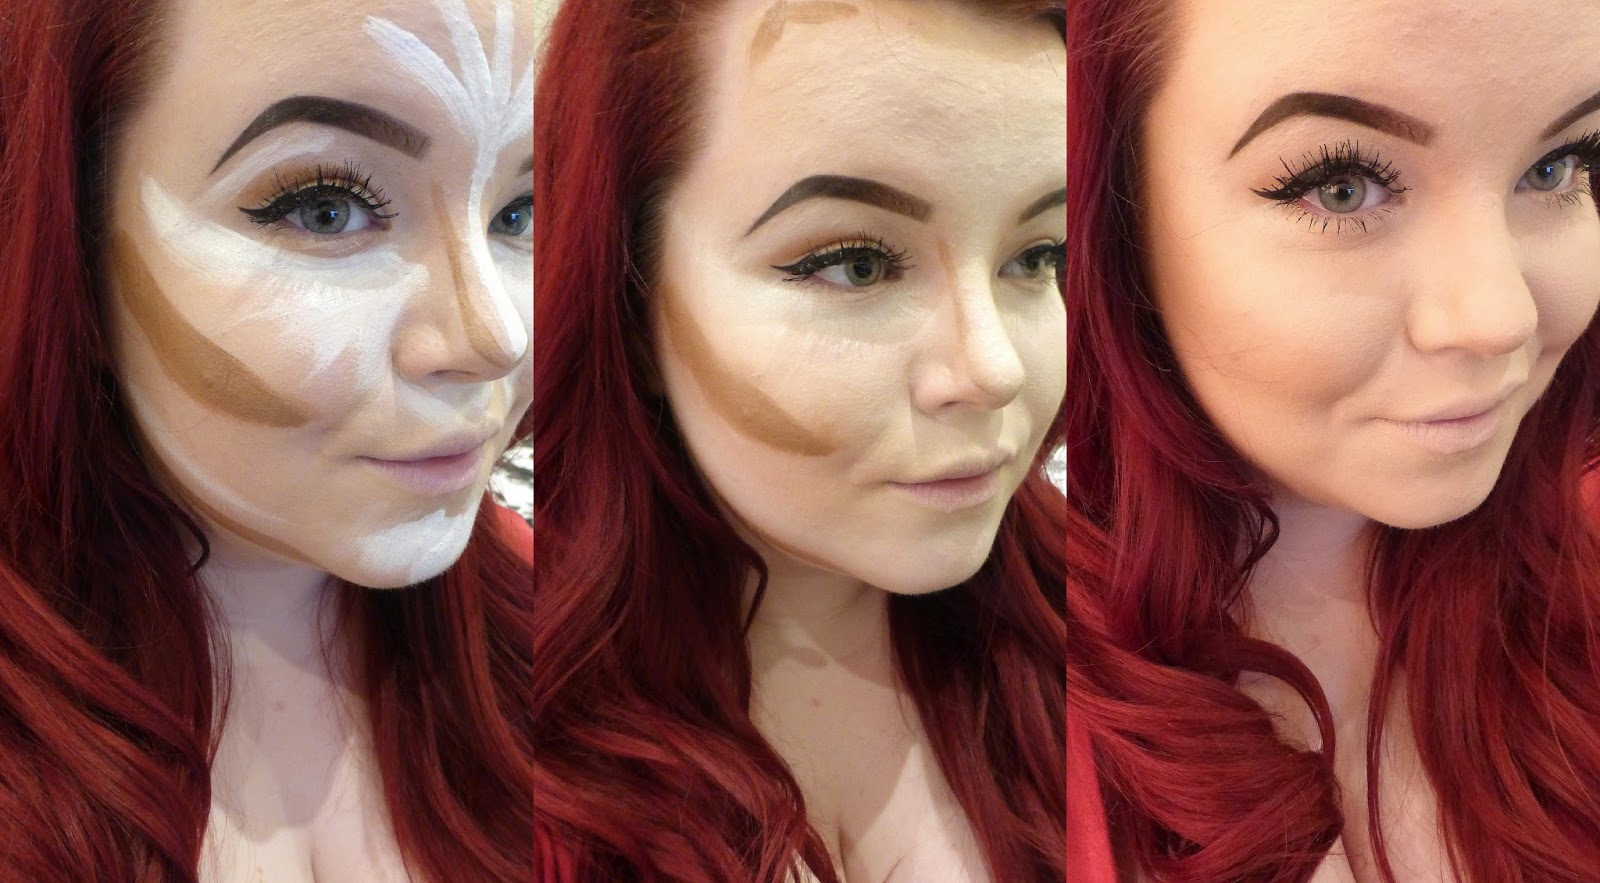
An optional start would be to add a thin layer of foundation whilst you do your eye makeup. The official starting point is to map out your highlight and contour. Depending on your face shape you’ll want to change this slightly depending on what suits you best. I find that I don’t need to contour my nose, but for the purpose of this post I have. Highlight: Under eyes, top of cheekbones, down the centre of the face and just above the jawline. Contour: Hollow of cheek bones, jaw line, around head line and down the sides of your nose.
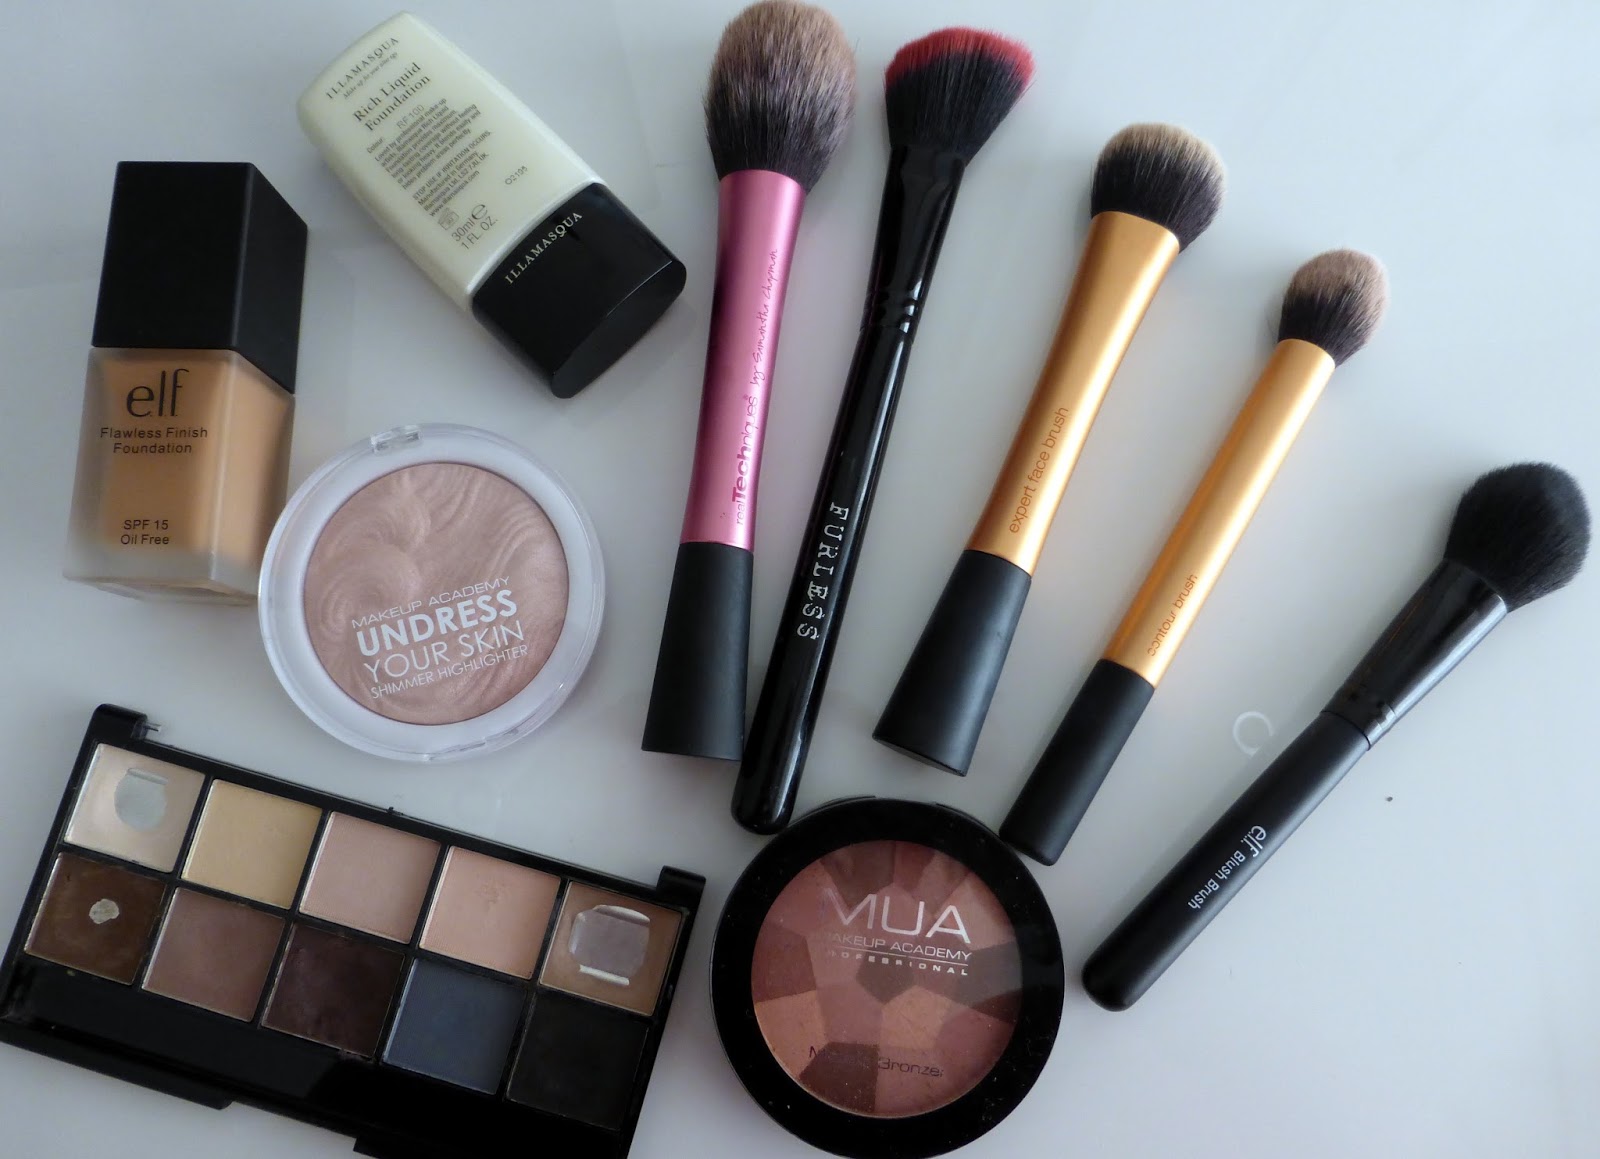
For this I have used Illamasqua’s Rich Base in White and Elf’s Flawless Finish Foundation in Almond. Next I have added a small amount of my usual foundation, in this case it was Revlon Colorstay in Ivory, to a Real Techniques Expert Face Brush and I start to blend in the highlight. Some people blend them both in at the same time, however with being so pale I find that it doesn’t suit my face shape as I need to keep a slightly harsher line for my cheeks. Then I’ll get a clean brush and buff in the contour, making sure that everything looks smooth and blended. (This would be enough of it’s own but then of course you can further the look and build it with other powders/creams in the next section.)
However, if all that sounds too complicated then there’s a quicker way to do it.
Powdered/Cream (Basic) Contour.
So, this is when you’ve already done your foundation/concealer base and just want very quick definition. You’ll need a natural looking colour of a shadow for this, I definitely recommend Illamasqua Hollow pigment for a cream base, I currently use an MUA eyeshadow as it’s a very light brown/grey colour and looks very natural on pale skin. If you’re a much warmer skintone then grab a shade that looks a little darker. You may be able to get away with slightly more orange pigments, whereas pale skins have to go grey. You’ll simply need to grab a contour brush and apply to your cheekbones, or where they should be. You’ll not need much if they’re already quite noticeable. This can also be done with a blusher depending on the shade and what suits you best. Start right at the hairline and stop about two fingertips away from your lips. I keep it in the hollow cheek if I’m using blush and then add a brighter colour to the apples. The same which you would do if you used a contouring/sculpting powder, keep quite low down the apples of your cheeks and add a blusher.
You can also use a bronzer or the contouring/sculpting powder around your hairline and jawline. Quick definition in seconds!
Highlighting
Unless you’re going for the full Kim K contour with a white or pale foundation, you may want to buy a separate highlighter, either a lighter powder or a shimmering one too. Add this to the top of the cheek bones, brow bone, down the centre of your nose and your cupids bow. It just adds some light and extra depth. Of course this can be done on it’s own, or along with the other steps.
Remember, you can follow a million contour tutorials and tips, but you’ll never know what suits you until you just try it out and have a play around! Let me know what works best for you.
